
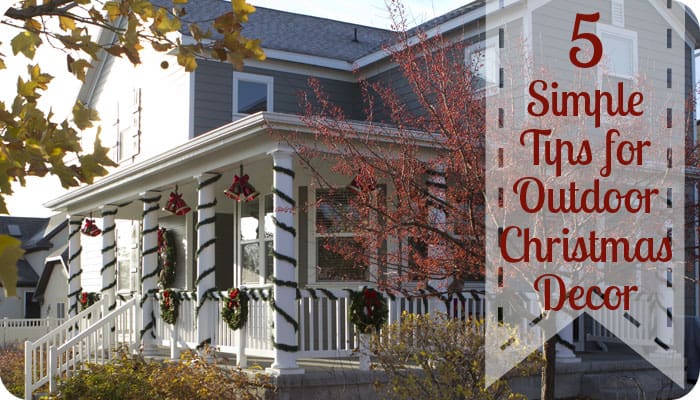
5 tips on outdoor Christmas Decorating
This content contains affiliate links or sponsored elements, read our Disclosure Policy.
We moved into a new house last year. Between me being pregnant, My Darling Husband starting a new job, and having to unpack, our outdoor Christmas decorations were pretty sad.
However this year we have enough time and energy to show off how Christmas crazy we are. Here are a few tips I’ve learned along the way when it comes to your outdoor Christmas Decorating.
 1. Have a theme.
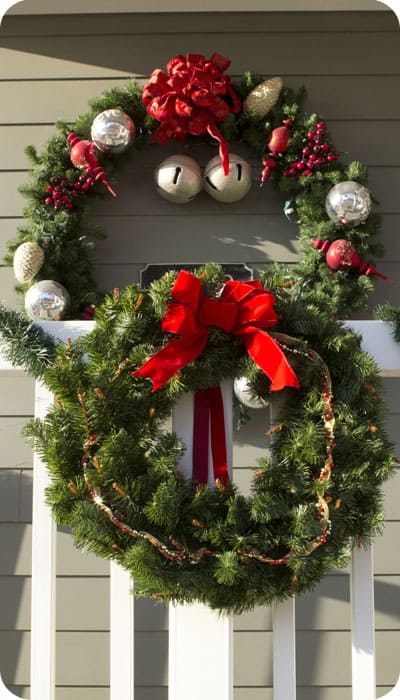
Just like you stick to a theme and color palette when you decorate a room, you should do the same with your decor. Our outdoor decor is the classic red, white and green, with some gold mixed in. We use repeating wreathes and bells to tie the whole porch together.
2. Be willing to do it in pieces.

We didn’t get all of this decor all at once. The really big wreath we snagged on clearance one year. We got the big ornaments on it the following year at a different clearance sale. We bought the small wreaths and bells this year. ( See the reason below) but will wait a year or two to put lights on them.
3. Know when to buy your decor.
I am all for getting a good deal. Which means getting it on sale and being patient. That’s what we did with the big wreath and large ornaments on it. This works great for big major decoration items. However if you want a repeating, matching look ( like the smaller wreaths and the large bells) you’ll want to grab those earlier in the season. And yes ( as much as it pains me) pay full price for them.
4. Think “seasons” of the day.
When you plan landscaping your try to make it look nice through all the seasons, so that each elements takes turn blooming and changing. This leads to a balanced and pleasant look. It’s good to also think this way with your outdoor decor. Sometimes people focus too much on night time and completely ignore the day time. Balancing both concepts can lead a very pleasant effect. The wreaths on the house and door have lights on them, but also have ornaments to make them nice looking during the day. The lights that line out house have white wire to blend in with gutters so they don’t stick out too much during the day.
5. Make it outdoor friendly

I spiffied up the porch wreaths with a little bead garland. I tied the garland to the wreaths with wire at five spots to secure it firmly so winter winds don’t destroy the decor. The same thing for the large wreath. I made sure that ornaments are tied with wire so it can handle wind.
Projects for the Perfect Christmas Party
- Modern Christmas Wreath DIY Felt
- DIY Christmas Earrings
- How to Spray Paint a Pre-Lit Christmas Tree
- Christmas Advent Calendar DIY
- Homemade Christmas Tags
- Cozy Christmas Tall Tree Pillow Tutorial
- 6 Ways to Engage Kids This Christmas
- Santa Hat How-To
- Mason Jar Cover Gift Idea
- Holiday Bread Wrap
- DIY Santa Hat Headband
Explore More Christmas Projects You’ll Love
- Mitten Ornament Pattern
- Ice Skate Ornament DIY
- Hot Chocolate Printables for Mason Jars
- Wooden Christmas Ornament DIY
- Nutcracker Ornament DIY
- How to Make a Snowman Ornament
- Felt Elf Tutorial
- Christmas Ideas
- No-Bake Christmas Wreath Cookies
- Perfect Stocking Stuffers for Sewing Lovers
- Mad Hatter Tea Party Paper Chandelier
- Giant Holly Leaves