
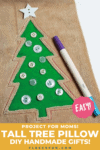
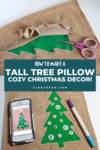
Cozy Christmas Tall Tree Pillow Tutorial
This content contains affiliate links or sponsored elements, read our Disclosure Policy.


Hello Fleece Fun readers, I’m Ren Murphy. You can usually find me at The Inspired Wren where I share inspired sewing, crochet, and craft projects. Today, I’m here to show you a Christmas tall tree pillow tutorial perfect for the Holiday Season.

This soft, squishy pillow with knit fabrics and reverse appliqué has a casual holiday look and makes a great gift. Even better, you can make this simple pillow with a basic sewing machine, some scraps of fabric, and those extra white buttons you already have on hand. The only thing I purchased for this project was a star-shaped button for the top of the tree, but even that is optional. Read on for step by step directions including full cutting dimension and a Tall Tree template so there’s no guesswork in recreating this huggable pillow.
MATERIALS:
See Cutting for the amount of materials needed. I was able to use scraps from previous projects. My favorite source for small amounts of fabric is the remnant bin at my local fabric store.
- Knit Fabric*
- Fiber Fill
- White Buttons, approximately 12–15 of various sizes
- Matching and Contrasting Threads
- Ball Point Needle (for working on knits)
- Marking Tool, water soluble marker or chalk
- Optional: Tall Tree Template [Download it here!]
- Optional: Embroidery Floss (for sewing buttons in place)
- Optional: Star Button
Christmas tall tree pillow tutorial:
Cutting the Fabric for your tall tree Pillow
The dimensions listed here will create a final Pillow approximately 8″ wide x 14.5″ tall.
Front/Back Panel Fabric: 10.5″ x 16.5″ cut 2
Green Tree Fabric: 6.25″ x 8.5″ cut 1
Constructing the christmas Pillow
Prepare the front panel
1. Trace the Tree Outline [download] onto the Front Panel fabric; align the asterisk on the vertical center line of the pillow and up 4 ½ – 5 ½″ from the bottom raw edge of the Front Panel (this example uses 4 ½″). You can also free-hand draw your own tree outline in place.

2. Pin the right side of the green Tree fabric to the wrong side of the Front Panel behind the tree outline.
3. Working with the Front Panel up, using thread matching the Front Panel fabric and a short stitch, sew directly on the outline traced in Step 1, catching both layers of fabric; be sure to lift your pressure foot with the needle down and pivot at each angle-point/corner.

4. Switch thread to your contrast color and using a long stitch, sew just outside of your first set of stitching.
Quick Tip
For extra oomph when topstitching with a contrast color, thread your machine as you normally would with TWO spools of the same color (you can use a bobbin for the second spool) and thread both strands through the eye of your one needle.
5. Stitch with contrasting thread — for extra oomph use two strands of thread through one needle.

6. Carefully pull the Front Panel fabric and the Tree fabric apart from within the tree shape and snip into the Front fabric only. Cut away the Front fabric inside of the tree shape as close to the first set of stitching as possible. On the reverse, trim the excess green Tree fabric from the outside of the tree shape.
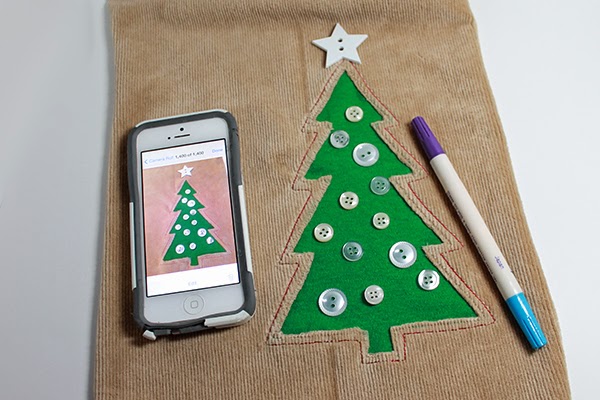
7. Randomly place the Buttons on the Tree, sew them in place with contrast color thread or embroidery floss. Optional: Sew a Star Button in place on top of the tree.
Quick Tip
Once you find an arrangement of buttons you prefer take a quick phone pic and then mark each spot so you’ll know which size button goes on which spot. Also, don’t bother to knot and cut your thread/floss between each button, just keep going from button to button with one strand.
Assemble the Christmas tall tree pillow tutorial

8. Pin the Front Panel and Back Panel right sides together.
9. Leaving an opening along the bottom edge for turning and stuffing, sew all sides with a ¼″ seam allowance.
Quick Tip
Once you find an arrangement of buttons you prefer take a quick phone pic and then mark each spot so you’ll know which size button goes on which spot. Also, don’t bother to knot and cut your thread/floss between each button, just keep going from button to button with one strand.

10. OPTIONAL, Box the corners: Pinch one corner so that the stitched seam is centered on the triangle created. Stitch across the triangle, perpendicular to the seam allowance and 5/8″ down from the corner point. Do not trim (it’s small enough that there’s no need). Repeat on the remaining three corners.

11. Turn the pillow right sides out and stuff with Fiber Fill.
12. Hand stitch the opening closed along the bottom edge.

Your tall tree pillow is done!
I first created this appliqué on a knit dress for my daughter, but she has sadly since outgrown it. I loved the look of the reverse appliqué and the buttons as ornaments so much that I decided to recreate it on a pillow so I could pull it out every year. I’m sure it would also look great on a sweatshirt and with various color buttons instead of all white. Ooh! And I bet a snowy white tree on a pale blue background with royal blue buttons would be beautiful. There is never enough time in the day to sew all the projects we see in our heads, is there? You’ve completed the Christmas tall tree pillow tutorial.
If you sew one of these Tall Trees in any variation I’d love to see it. Come share your projects on The Inspired Wren Share page. There you can link up images of your work from a blog, Flickr, Pinterest, or Instagram.
Thanks for having me today, Angel, it’s a privilege.

Come stop by The Inspired Wren and have a look around. You’ll see I publish a new tutorial on the First Tuesday of every month, and I host Inspire Us Thursday: Sew Needle Stitch Hook, a weekly link party dedicated to fiber. In between I also share what I’ve been creating, provided I have enough chocolate to pay my model (and daughter), The Peanut.
Need even more? You can also find me on Instagram, Pinterest, and Facebook.
Ren Murphy writes for The Inspired Wren.
More Pillow Tutorials!
- All Americana Stars Pillow
- Valentine’s Day Fleece Pillow Slipcover
- Ruched Pillow
- Seeing Stars Pillow
- Heart Pillow
- Chenille Heart Pillow
- Pinwheel Quilt Block Pillowcase
- Easy Block Pillow
Projects for the Perfect Christmas Party
- Modern Christmas Wreath DIY Felt
- DIY Christmas Earrings
- How to Spray Paint a Pre-Lit Christmas Tree
- Christmas Advent Calendar DIY
- Homemade Christmas Tags
- 6 Ways to Engage Kids This Christmas
- 5 Tips for Outdoor Christmas Decorating
- Santa Hat How-To
- DIY Santa Hat Headband
Explore More Christmas Projects You’ll Love
- DIY Cloche Ornament
- Hot Chocolate Printables for Mason Jars
- Felt Gingerbread Man Pattern
- DIY Gnome Ornament
- Santa Ornament DIY
- Ballet Slipper Handmade Ornament
- DIY Homemade Ornament with Gnomes
- Christmas Embroidery Designs Noel Hoop Ornament DIY
- Angel Handmade Ornament DIY
- Holiday Bath Bombs DIY
- Christmas Tree Pillow
- Christmas Terrarium DIY with Cricut Maker
- Free Christmas Printable Joy World
- Free Christmas Printable for Hot Chocolate
- Free Christmas Printable for Apron

Thanks again for having me, Angel!
You’re welcome Ren! Love this tutorial – I might just have to make one!
Cute!! I’ve got a Craft Gossip post scheduled for this evening that links to your tutorial:
http://sewing.craftgossip.com/tutorial-tall-christmas-tree-pillow/2014/11/10/
–Anne