
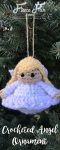
Angel Handmade ornament DIY (free crochet pattern)
This content contains affiliate links or sponsored elements, read our Disclosure Policy.

Hi, my name is Erica and my blog is called 5 Little Monsters, I’m sharing a Angel Handmade ornament DIY. On my blog you will find all kinds of crafts, lots of free crochet patterns, Cricut projects, some sewing projects, embroidery, and more. One of my favorite forms of crafting is crochet. As a mom of 6 kids (I only had 5 when I started blogging and that is where the name of my blog comes from) I can’t always find time to sit at my sewing machine even though I really enjoy sewing, but I can take a skein of yarn anywhere in the house, to pick up kids from school, to the park, or wherever else I may be. The portability makes it perfect for this phase of my life.
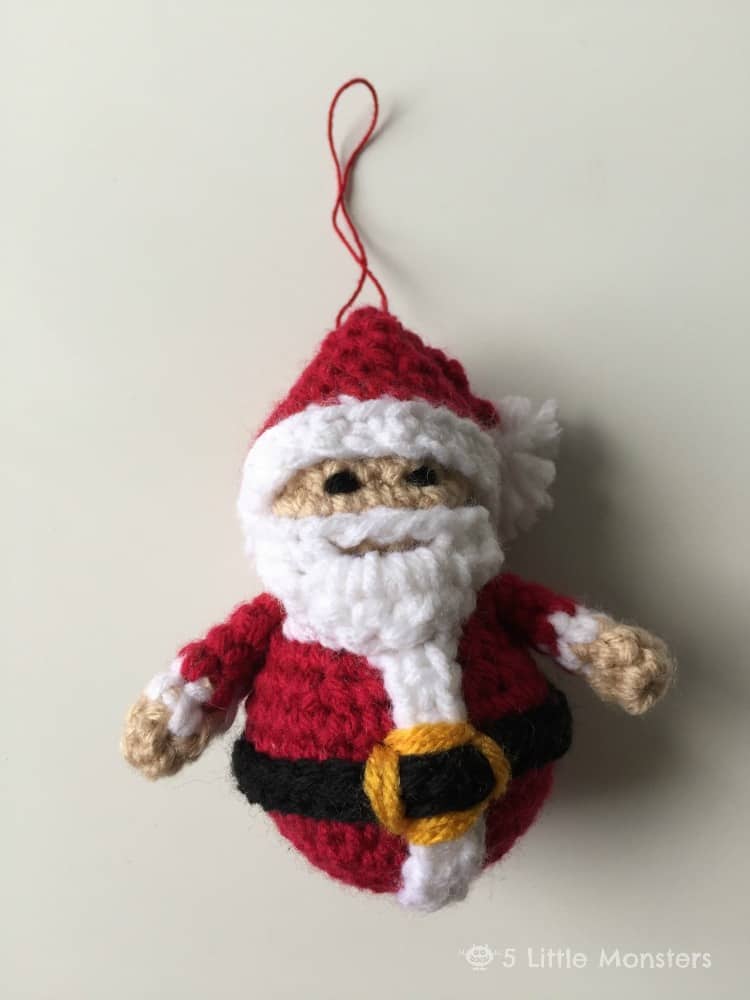
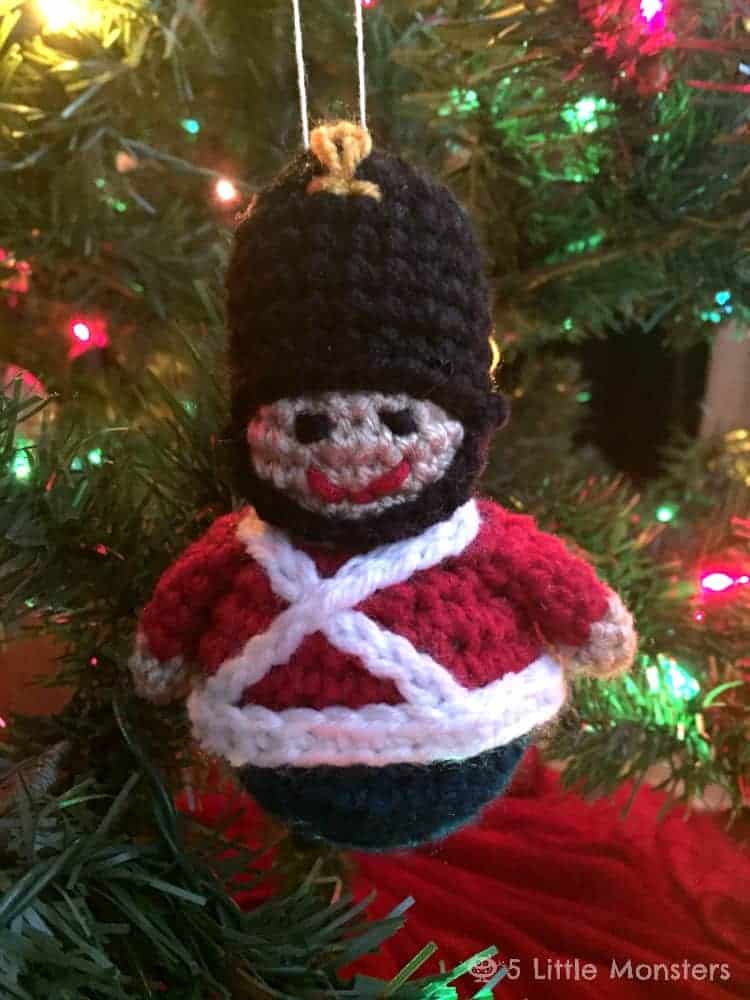
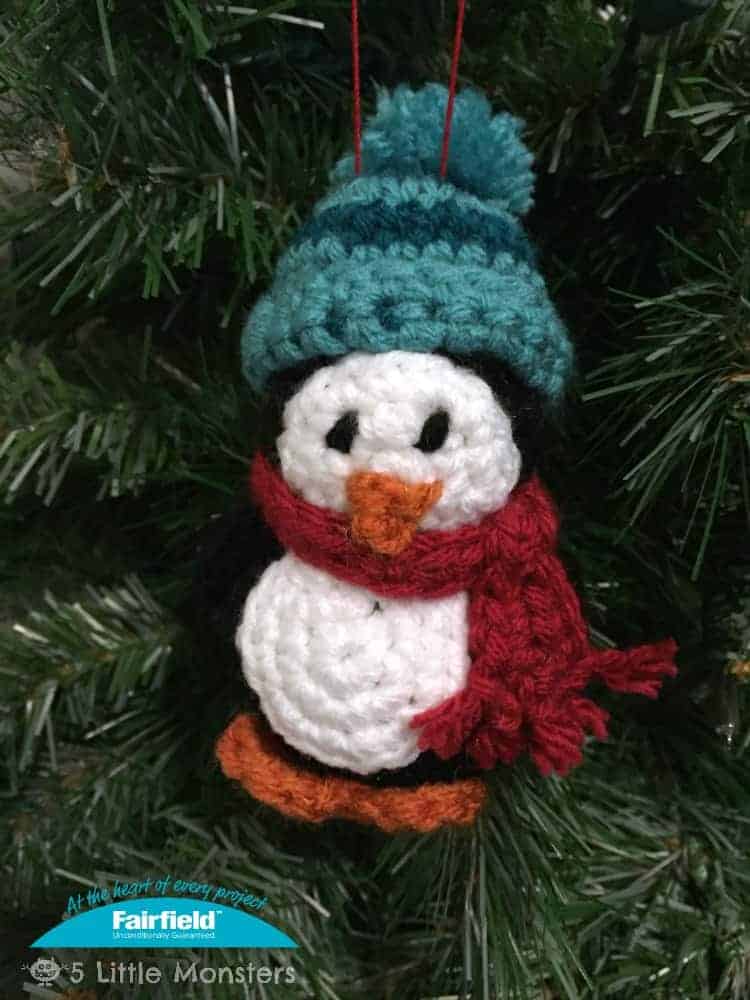
A couple of years ago I made a series of Christmas ornaments that included a Santa, a snowman, a tin soldier, and a penguin. All of the ornaments were made with the same basic body shapes so they all went together as a set. I really liked the way those little ornaments turned and ever since I made them I have been wanting to add to the set. I decided that this year I was going to and the first one I wanted to add was a little angel. This angel ornament I am sharing today is what I came up with. She has a little white dress, yellow braids, and sparkly wings. I think she makes a nice addition to the set or is a great little ornament all on her own.
Supplies
Worsted Weight Yarn in White, Tan, and Yellow (Sample made with Red Heart Super Saver in White, Buff, and Goldenrod)
Fine Weight Yarn in White with Silver (Sample made with Vanna’s Glamour in Diamond)
G Crochet Hook
Stuffing
6 mm Safety Eyes
Yarn Needle
Scissors
Twine or Thread for Hanging Loop
Instructions – Angel Handmade ornament DIY (free crochet pattern)
The first part you will crochet is the body and head portion. It is crocheted in one piece and stuffed as you go. You will crochet in the round without joining the rounds. Start with a magic ring.
Begin with white yarn
Round 1: in mr, ch 1, 6 sc (6 sc)
Round 2: 2 sc in each stitch (12 sc)
Round 3: [1 sc in first stitch, 2 sc in next] repeat around (18 sc)
Round 4: [1 sc in first 2 stitches, 2 sc in next] repeat around (24 sc)
Round 5: [1 sc in first 3 stitches, 2 sc in next]repeat around (30 sc)
Rounds 6-8: 1 sc in each stitch (30 sc)
Round 9: 1 sc in blo of each stitch (30 sc)
Round 10: [1 sc in first 3 stitches, sc2tog] repeat around (24 sc)
Round 11: [1 sc in first 2 stitches, sc2tog] repeat around (18 sc)
Round 12: [1 sc in first stitch, sc2tog] repeat around, change to tan yarn at the end of the row (12 sc)
Round 13: 2 sc in each stitch (24 sc)
Round 14-16: 1 sc in each stitch (24 sc)
Add safety eyes between rows 15 and 16 (if you don’t want to use safety eyes you can embroider eyes on later)
Round 17: [1 sc in first 2 stitches, sc2tog] repeat around (18 sc)
Round 18:[1 sc in first stitch, sc2tog] repeat around (12 sc)
Round 19: sc2tog, repeat around (6 sc)
Finish off
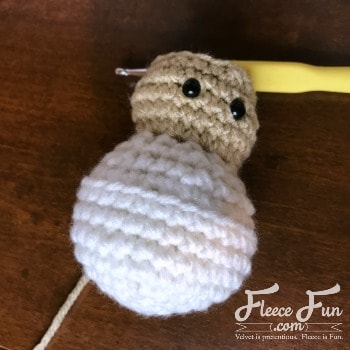
Add the skirt to the front loops left open in round 9
Round 1: Attach yarn in one of the front loops from round 9, ch 3, dc in same stitch, dc in next stitch [2 dc in next stitch, 1 dc in next] repeat around, slip stitch in top of beginning ch 3 (45 dc)
Round 2: [ch 3, skip 1 stitch, slip stitch in next] repeat around
Finish off, weave in ends
Next make 2 arms, start with tan yarn with a magic ring
Round 1: in mr, ch 1, 6 sc (6 sc)
Round 2: sc in each stitch, change to white yarn (6 sc)
Round 3-6: sc in each stitch (6 sc)
Finish off leaving long end for sewing
Sew one arm to each side of the body along the neckline.
Make the hair
Start with yellow yarn
Round 1: in mr, ch 1, 6 sc (6 sc)
Round 2: 2 sc in each stitch (12 sc)
Round 3: [1 sc in first stitch, 2 sc in next] repeat around (18 sc)
Round 4: [1 sc in first 2 stitches, 2 sc in next] repeat around (24 sc)
Rounds 5-6: 1 sc in each stitch (24 sc)
Round 7: slip stitch into next stitch, skip 2 stitches, 5 dc in next stitch, skip 2 stitches, sl stitch in next stitch (1 shell, this is the front of the hair “the bangs”)
Cut 18 pieces of yarn about 10” long, fold one piece in half, pull the folded end through one of the stitches from round 6, pull the cut ends through and pull to tighten, continue to attach all of the pieces in this way until you have pieces attached all around the hair except the front shell
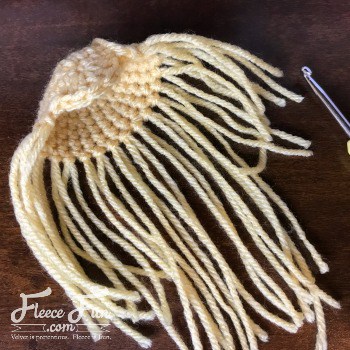
Divide the hair in half so you have 9 pieces (18 strands) on each side of the head and braid, tie off the ends of the braids and trim so that the ends are even and the braids are the same length, stitch hair to head
Make the Wings
The wings are made with the fine weight sparkly yarn
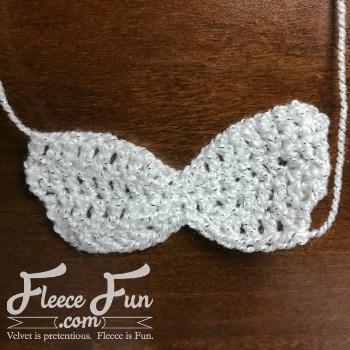
ch 21
Row 1: dc in 3rd ch from hook (first 2 ch do not count as a stitch), dc in next 6 ch, hdc in next stitch, sc in next, sl st in next, sc in next, hdc in next, 1 dc in each of the last 7 stitches
Row 2: ch 2, dc2tog, dc in next 5 stitches, hdc, sc, sl st, sc, hdc, dc in next 5 stitches, dc2tog
Row 3: ch 2, dc2tog, dc in next 4 stitches, hdc, sc, sl st, sc, hdc, dc in next 4 stitches, dc2tog
Row 4: ch 2, dc2tog, dc in next 3 stitches, hdc, sc, sl st, sc, hdc, dc in next 3 stitches, dc2tog
Finish off, cut yarn leaving long tail for sewing
Stitch wings to back of angel

Some other ornaments that you might enjoy are: my Santa Ornament https://www.5littlemonsters.com/2015/11/crocheted-santa-ornament.html
my Toy Soldier Ornament https://www.5littlemonsters.com/2015/12/toy-soldier-christmas-ornament.html
and my Penguin Ornament https://www.5littlemonsters.com/2015/11/penguin-christmas-ornament.html
Ornaments You’ll Like for Christmas
- Reindeer Felt Handmade Ornament DIY
- Let It Snow Embroidery Hoop Ornament DIY
- Christmas Embroidery Designs Noel Hoop Ornament DIY
- How to Make a Snowman Ornament
- Felt Elf Tutorial
- Mini Top Hat Ornament Tutorial
- You can see all of Handmade Ornament Tutorials on this page
- You can see just my Felt Christmas Ornaments here
Explore More Christmas Projects You’ll Love
- DIY Cloche Ornament
- Felt Gingerbread Man Pattern
- DIY Gnome Ornament
- Santa Ornament DIY
- Ballet Slipper Handmade Ornament
- DIY Homemade Ornament with Gnomes
- Christmas Advent Calendar DIY
- Homemade Christmas Tags
- Cozy Christmas Tall Tree Pillow Tutorial
- Holiday Bath Bombs DIY
- Christmas Tree Pillow
- Christmas Terrarium DIY with Cricut Maker
- Free Christmas Printable Joy World
- Free Christmas Printable for Hot Chocolate
- Free Christmas Printable for Apron