
DIY Cloche Ornament (Shatterproof!) Homemade Christmas Ornaments
This content contains affiliate links or sponsored elements, read our Disclosure Policy.
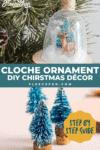
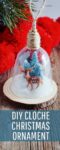
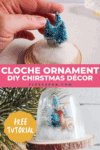
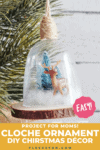

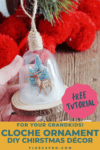
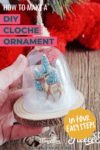
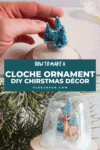
Handmade Christmas Ornament: This DIY Cloche Ornament is shatterproof, and a wonderful addition to Homemade Christmas Ornaments. With a few basic materials you can make several variations of this ornament. Perfect for your tree or a hostess gift.

I love the look of a glass cloche, but with a curious toddler around the house, such a delicate ornament isn’t very practical. That’s why I love this variation of a “glass” cloche. Not only is it more affordable to make, the ornament is lighter, and shatterproof thanks to its clever plastic dome.
YOU WILL NEED:
Supplies:
- 1 Wood Round
- White Craft Paint
- Plastic Wine Glass (just the top half)
- Twine
- Tiny Reindeer Figurine
- 3 Tiny Bottlebrush Trees (reindeer and trees are in this set)
- Small Amount of Polyfill
- 1 Small Wine Cork
Tools Needed:
- Hot Glue Gun and Glue
- Paint Brush
- Scissors
- Saw (hacksaw or chop saw), optional but nice to have!
DIY Cloche Ornament Tutorial
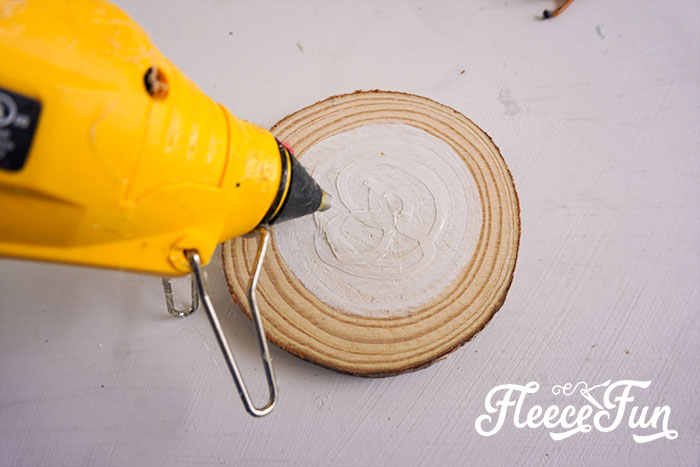
Step 1 – Prep the base of the Christmas Ornament
Paint a circle inside the wood round to a diameter matching that of the opening of the wine glass.
Allow paint to dry.
Step 2 – Prep the items that go under the Cloche
Cut the wine cork in ⅔ and ⅓ portions.
Hot glue the portions of wine cork on the bottom of two different bottle brush trees,
creating 3 trees of differing heights.
Make sure that they fit under the cloche!
Paint the wine cork and base of the trees white. Allow paint to dry.
When the paint on the wood round is dry, form your polyfill into a flat circle that fits inside your wine glass opening.
Trim with scissors, if necessary.

You won’t want any polyfill to be sticking out the bottom of the DIY Cloche Ornament, so trim it neat.
Hot glue the trees in place, clustered on one side, being sure to press down deeply in the polyfill to make sure the glue soaks through to connect with the wood round.
With a tiny leftover piece of polyfill, wrap it around any exposed areas of the tree bases and wine corks, hot gluing that in place.
Hot glue the reindeer in place, pressing down deeply in the polyfill to make sure the glue soaks through to connect with the wood round.
Step 3 – Creating the “Glass” Cover for Your DIY Cloche Ornament
Trim the bottom of the wine glass stem off to about 1-inch long with the saw. This step is optional–you can leave the stem as long as you want.
Cut a 3-inch long length of twine and fold it over to make a loop.
Hot glue both ends of this twine to the stem of the wine glass.
Wrap the twine around the stem of the wine glass, hot gluing it in place and keeping the loops tight.
Be sure to wrap the twine around the opening in the wine glass stem and close it off.
Step 4 – Assembling Your DIY Cloche Ornament
Glue the wine glass cloche down onto the wood round, being careful to use as little hot glue as possible.
If you get any hot glue outside where you want it, you can trim it off with an exacto knife or similar.
Hang your DIY Cloche Ornament and enjoy!
Christmas Crafts You’ll Like to Try
- DIY Felt Ornaments Tips, Tricks, and Templates
- Gingerbread House Ornaments DIY
- DIY Felt Candy Christmas Tree Ornaments
- Felt Gingerbread Man Pattern
- DIY Gnome Ornament
- Mitten Ornament Pattern
- Ice Skate Ornament DIY
- Snowflake Ornament DIY
- Felt Fox Ornament DIY
- Giant Holly Leaves
- See 40 Snow Ideas for Kids!
- You can see all of Handmade Ornament Tutorials on this page
- You can see just my Felt Christmas Ornaments here
Explore More Projects You’ll Love
- Santa Ornament DIY
- Ballet Slipper Handmade Ornament
- DIY Homemade Ornament with Gnomes
- Christmas Embroidery Designs Noel Hoop Ornament DIY
- Angel Handmade Ornament DIY
- Christmas Advent Calendar DIY
- Homemade Christmas Tags
- Cozy Christmas Tall Tree Pillow Tutorial
- Holiday Bath Bombs DIY
- Christmas Tree Pillow
- Christmas Terrarium DIY with Cricut Maker
- Free Christmas Printable Joy World
- Free Christmas Printable for Hot Chocolate
- Free Christmas Printable for Apron
- 5 Ways to have a Fun Family New Year’s
- New Year’s Printable
